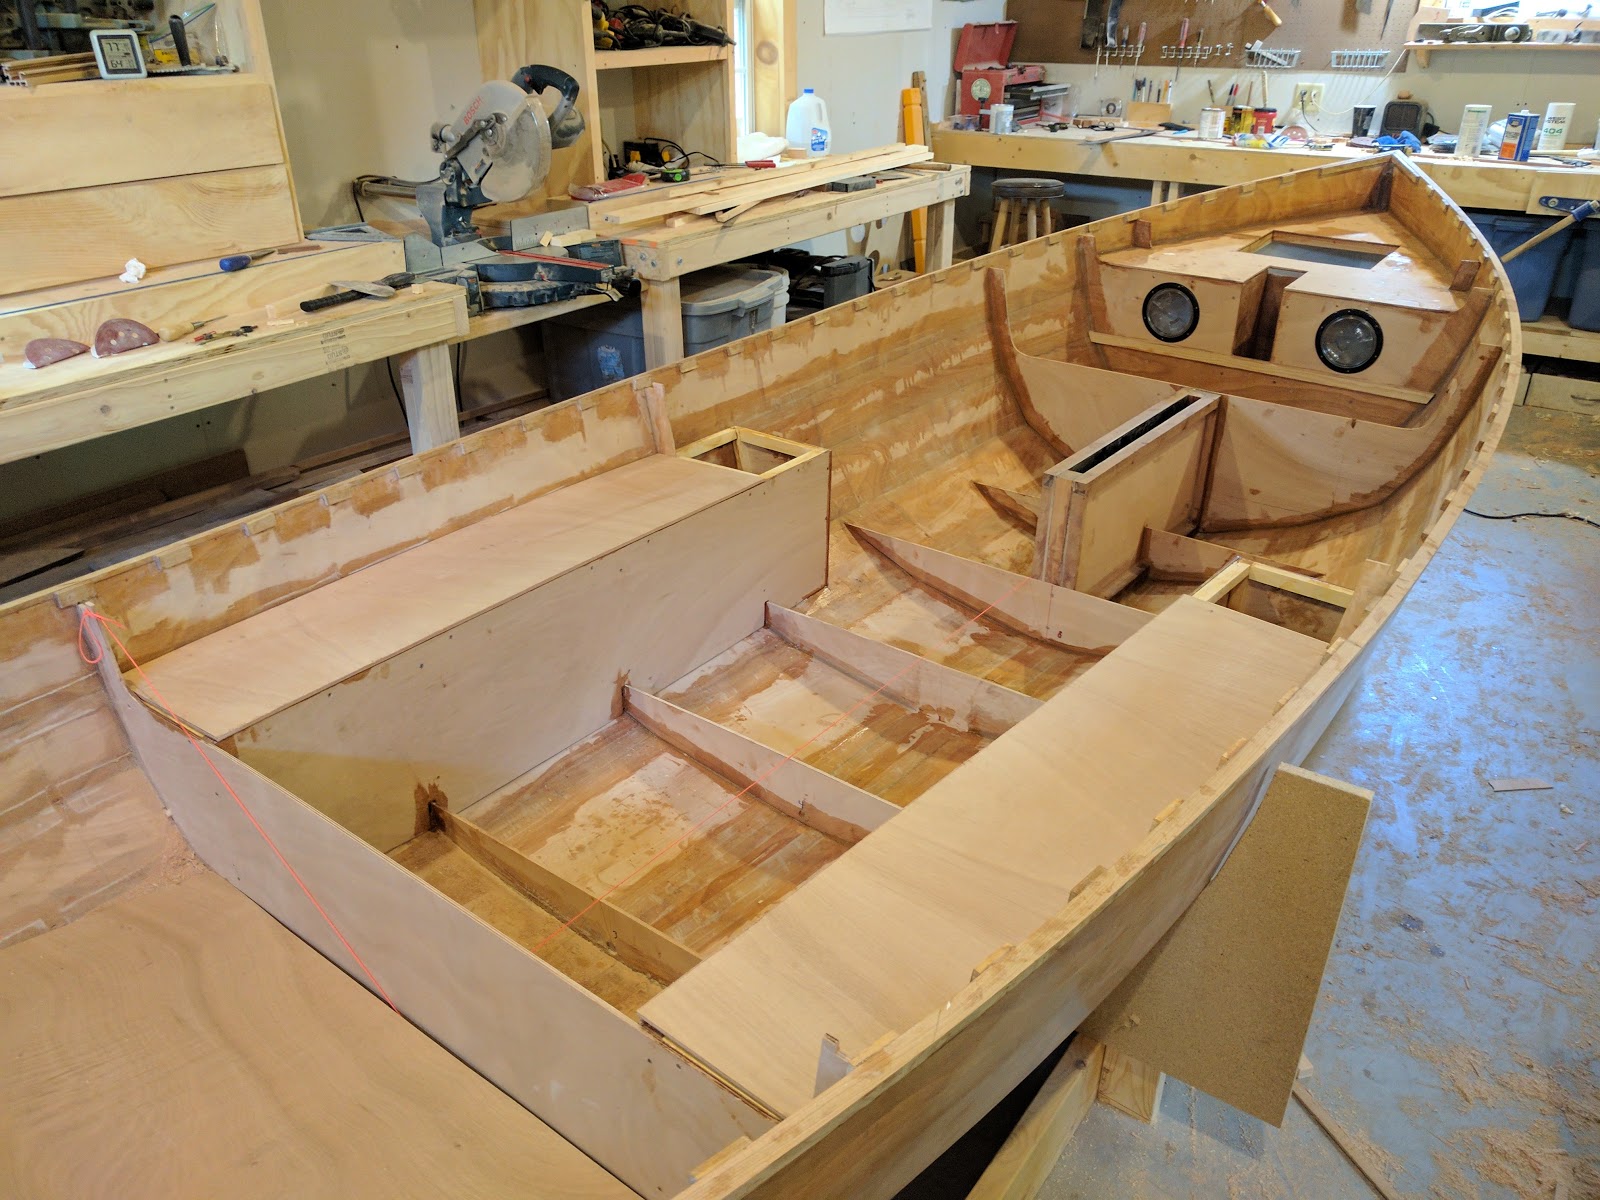
With the forward deck area roughed in, it was time to move aft and fill in some structural details that should really stiffen the boat up. As I've said in previous posts, I have gone rogue for the interior and other than a few vague reference points, I am not working off the plans anymore. It's not that they aren't good, I just wanted something a bit different.

So with that said, I spent a fair amount of time staring at the empty hull trying to envision where everything would go and how it would fit. After many beers and many days, I finally arrived at an executable plan. Part of the consternation I had came from deciding the elevation of the floor which dictates the elevation off the hull of the frames. I ended up running a taught string fore and aft and found an elevation that would allow for flat floors for the entire length of the cockpit and a transition area to seat with watertight tanks on each side. To add to the mix, I'm planning on a removable thwart to allow for a sleeping area when not underway.

Once I established elevations with the string, I made hot glue templates at the frame locations and cut out the 4 frames needed with the bandsaw. After a few adjustments with the rasp to get everything fit well, I mixed up a batch of thickened epoxy and fileted them in place.
After letting them cure I made templates for the side panels of the cockpit seats. Since these will be watertight, they are extending down below the frames and will be filleted and taped to the hull. I notched out the location of each frame for both sides and got them fitting in place nicely like an interlocking puzzle. I cut white pine stringers (I think that's the wrong word) to add some rigidity where they mount to the frames and epoxied everything in place. I know that eastern white pine is not particularly rot resistant, but it is light and all of it will be encapsulated in epoxy and not continuosly exposed to water, so I think I'm good. Plus around here it is really cheap.
After waiting for another cure cycle I cut more stringers to help strengthen up the top and to act as a surface to mate the top of the seats to and did some more epoxying... The endless small bits glued into place that have to wait to cure is getting old at this point, but what can I do.
Finally, I made templates for the top of the seats, but left the forward section open for now. I plan on mounting a bulkhead bilge pump (Whale Compact 50) on one side so I want to have an access panel from the top for servicing, but I haven't decided which side to mount it on yet. The side that I don't mount it on will end up being epoxied in place. The other, more practical reason for not cutting the seat tops to full length is that I am trying to save wood and only have a 4'x4' sheet left.
Next up I will be taping the frames over the filets with 75mm tape as well as the bottom of the seat sides. I'll probably hold off gluing the seat tops in place until I get some of the aft deck framing completed.
 It's a galvanized Karavan KBE 1250 and it has sealed/submersible LED lights that actually work and are bright. Woohoo. I'm sure I will break the harness somehow in short order, but at least it will not shake the boat apart. It has the new style torsion suspension that I'm told has a less bouncy ride.