Wednesday, July 26, 2017

A Step Forward and a Step Backward

So I have made a lot of progress in the past week, but like everything these days, it just doesn't seem like as much as the early days.  I started off by getting the aft compartment painted with 2 coats of primer on all surfaces to before epoxying the rear deck in place.  I know final paint will wait, but doing the priming now should make things easier down the line.

After I got the smell out of the shop when the second coat was finally dry, I glued down the rear deck and seat tank tops and held them in place with screws while the epoxy kicked.  Fast forward a day and I took the router with a roundover bit and trimmed off the edges of the seat tanks and did the same around the hatch coaming channel.

Next up, I sanded down the entire interior below the seat tanks and rolled on a coat of unthickened epoxy.  Overall I spent about 3 hours sanding and because there were so many tight corners, the vast majority of it was done with little pieces by hand.  In fact, I sanded so much with my fingertips that my fingerprint reader on my phone and computer stopped working for several days.  I literally sanded off my fingerprints.

Once the coat of epoxy was mostly dry (the next day), I fitted floor stringers (probably the wrong word here) to the frames that will be used to accept fasteners from the floorboards and help stiffen the plywood frames.  I epoxied them in place with thickened epoxy and then painted on a coat of unthickened epoxy to seal them up.

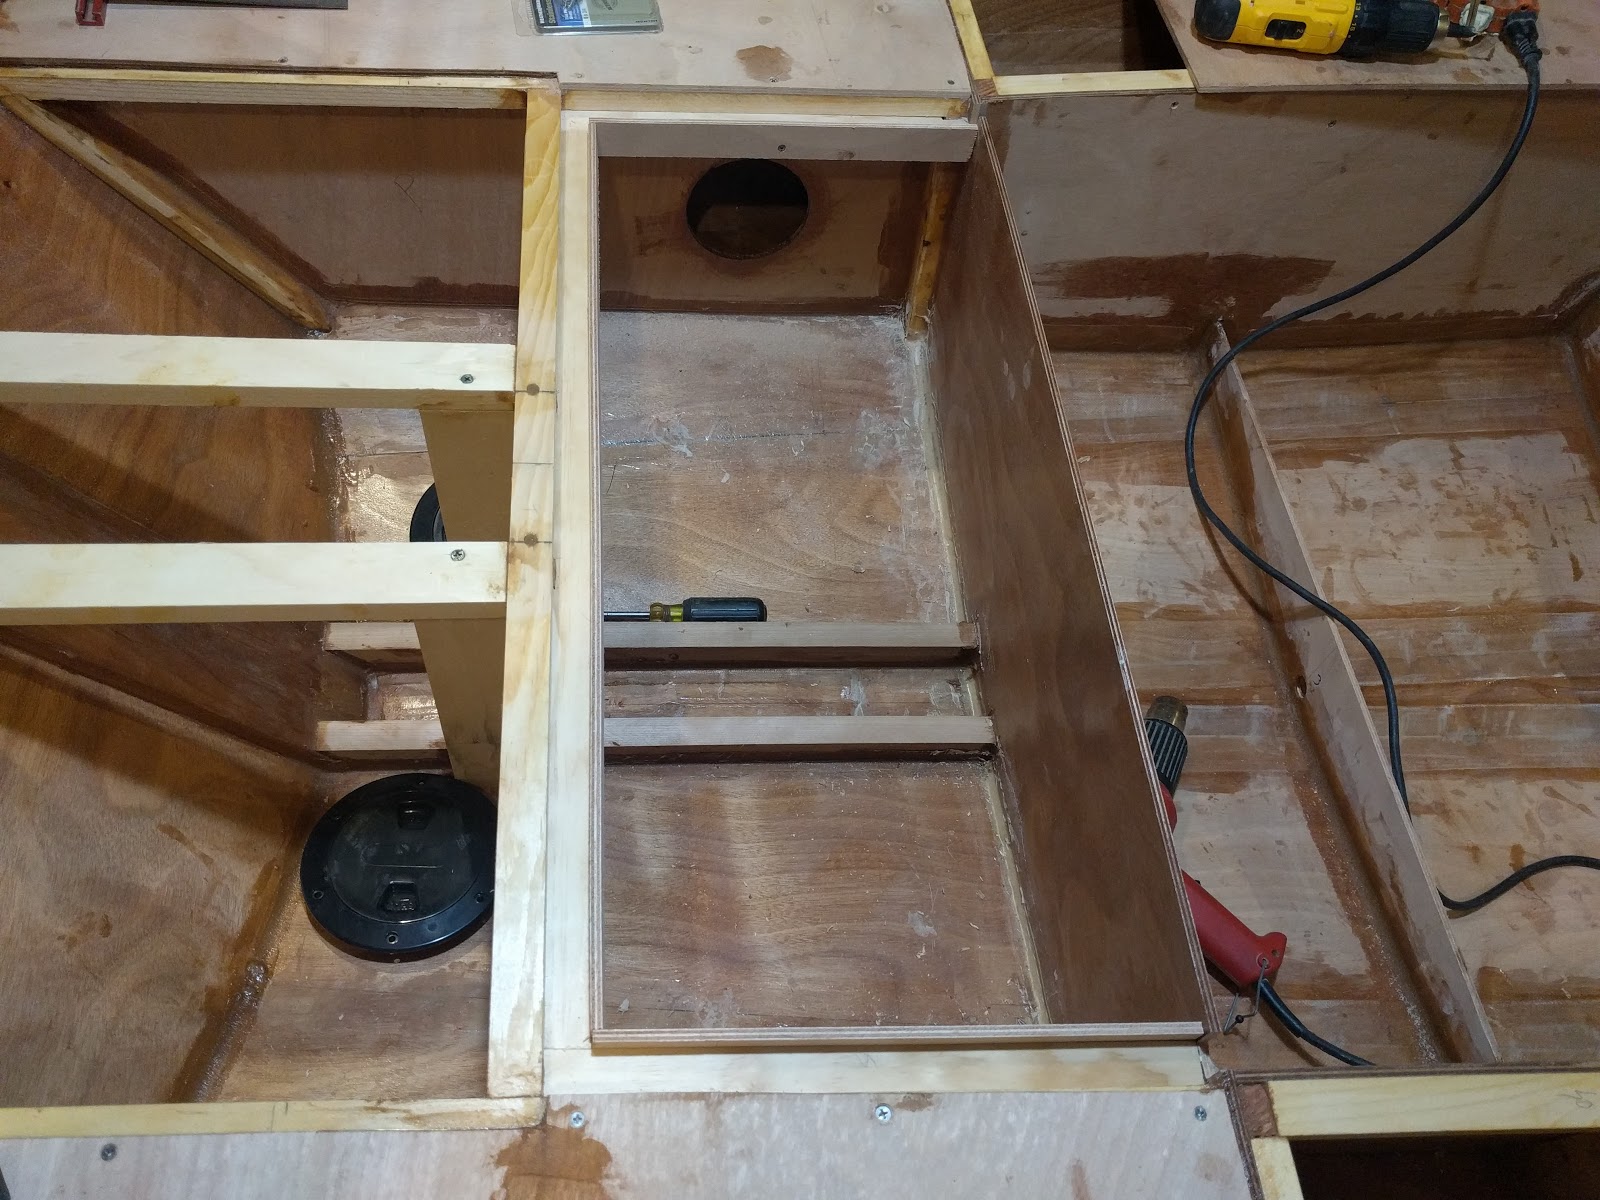
I spent some time cleaning up and sanding the seat tops and rear deck and that's when I found the screw up.  I have been planning on doing pine planks on top of the seat tanks, rear decks, and seat compartment but as I visualized how I would do it so it would look good, I realized I had made the rear compartment hatch and opening too wide to accommodate the pine planks running fore and aft without cutting out part of them.

So after several days of thinking about whether to just get on with it or fix it so it doesn't bug me, I came up with a plan to fix it that wouldn't take too long and would allow me to decrease the width of the compartment.  In a nutshell, I cut out a notch in the front and rear of each side of the compartment coaming and glued in another channel.  At the same time, I decreased the width of the compartment hatch by cutting off the ends and glued in 2 new pieces for ends.  I lost about a day's work, but in the end it will look better once the pine planks are in place and run fully fore and aft without any cutouts that disrupt the visual flow.  A side benefit is that the channel will drain water better and keep it out of the compartment.

Finally, I found some nice clear pine planks that will make good seat tops and had just enough time this afternoon to rough cut them out.  They will have to be bent in place, but I was able to easily push them into place to accept the curve of the seats as they move aft.  What I need to do first though is to epoxy plywood risers on top of the rear deck, seat tanks, and hatch.  These will allow the planks to have a little space underneath them to drain water, but I'm not 100% sure that I will do that.  I won't be able to work on the boat for the next few days so I'll have some time to mull it over.


Tuesday, July 18, 2017

Stepped

For once, I finished a project in the time I allotted myself.  The mizzen mast step assembly is done and mostly glued in.  Now that there aren't single big jobs to focus on I have been trying to get better at organizing and doing many small jobs at once.  I can easily see where build projects like these can go from months to years.  Hopefully it won't come to that and I still have hope that I will get the boat finished and launched by the end of August.  We'll see.

I mentioned in the previous post that I was going to use a piece of 3" pvc pipe to contain the mizzen mast and keep water out of the aft compartment.  I spent a fair amount of time getting and marking the 94 degree angle needed to have a 6 degree rake on the pvc pipe before cutting it. I had bought enough extra in case I screwed up, but I think it worked out fine.

Next I found a nice old piece of mahogany that used to be a deck support in my Alberg 35 and shaped it so it would fit in the channel I installed earlier when I was building the supports for the aft deck.  I like using salvaged wood where I can because in many cases, the quality of the older wood is way better than what you can buy today.  This piece was in the Alberg for at least 40 years and I like the thought of carrying a piece of my old boat with me for new adventures.


Next, I bored out a 25 mm hole on center to accommodate the butt of the mizzen mast and drilled out limber holes in the top and bottom to make sure water drained.  Next I found another piece of mahogany (from a different project) and bored out a ~90 mm (3.5 inch) hole to accept the butt of the pvc pipe.   I did a little shaping to get a good fit in between the deck support pieces and then epoxied both pieces into the boat (one on top of another).

The step assembly will be the only piece I actually epoxy to the boat; pvc pipe will just have sealant holding it in place and the top piece on deck (collar?) will be screwed to the surrounding deck supports with #12 x 2" screws and waterproofed with a bead of sealant.  This way I will be able to disassemble the step for periodic inspections and make sure everything is ok.

For the top piece I used a piece of 25 x 190 mm wide white pine.  I know, it's shocking that I am not using some high end wood for some of this boat, but it's light, cheap and I can replace it if needed.  I am coating every piece of wood in this boat with epoxy, so hopefully I can keep rot in check.

Anyhow, I bored another 90 mm inch hole in it to accept the top of the pvc pipe and made a plywood trim piece to cover the pvc and screwed and glued it together. Once it cured, I did some shaping and radiused the corners to make it all pretty like and put it all together.  I haven't glued the plywood deck down yet because it will be easier to paint the compartment first, but aside from that, I'm calling the step done.


Thursday, July 13, 2017

Little Bits

It's been a while since I last posted but I've been on vacation up in Bar Harbor Maine for the 4th of July week. Obviously no boat work was done that week, but we did get a bunch of sailing time with the craigslist Force 5 I found last summer and was the inaugural post for this blog (Click Here). I did manage to sneak in a bit of work though before we left and this week as well, so all was not lost.  I'm still making good progress, but each step is taking a bit longer now because there are a bunch of small pieces that need to be glued to the boat in a very specific order and it just takes time.
My son enjoying the Force 5 in Somesville
When I last checked in I had just purchased a new trailer and was working my way aft building out the seat tanks and aft compartment.  I won't go into too much detail because honestly, it just took a ton of time to figure out all the cuts, angles and general layout when not working from a plan.  

The side seat tanks run aft of the daggerboard trunk to the sterb and will be watertight in case of capsize I will have several deck plates installed in them, but so far I have only installed the 4" aft plates that will be accessible from the aft compartment just forward of the mizzen.  

I also spent some time designing the mizzen mount and glassed in the 25 x 50 mm stringers that will run from the stern to the 1st bulkhead.  These will provide a channel to drain water from the mizzen mast to the bilge.  I've selected a piece of 3" pvc pipe to be the tube for the mizzen mast step that should keep water out of the aft compartment.  

For the aft compartment I built a channel around the perimeter and glassed sides onto the compartment lid that will fit into the channel to keep the water out (hopefully).  This took quite a while and lots of sitting and thinking to make sure I got it right.


Finally, I purchased a Whale Gusher Compact 50 for the bilge pump and cut out the mounting hole in the forward part of the port seat tank.  I think this will be a decent location because it will allow me to pump the bilge while seated with the tiller in hand. I'm not fully committed yet, but right now I'm leaning toward mounting the discharge in the stern adjacent to the rudder (obviously above the waterline). 

By the end of this upcoming weekend, I hope to finalize the mizzen step and get the tube installed at the 6 degree angle specified in the plans with the corresponding partners.  We'll see, but I don't think it should be too hard, I'm pretty sure I figured out the plan tonight while sitting and staring at the boat.  Aside from that I have to glass in 'stringers' to the plywood frames to provide some material for the floorboards to screw into.